Welcome back to our AWS DevOps journey! 🌟
In my previous blog post, we delved into the world of AWS EC2 Automation and Autoscaling, exploring the power of automating infrastructure deployment and scaling in the cloud.
If you haven't had a chance to read it, you can find it here.
Today we will focus on setting up an Application Load Balancer (ALB) with AWS EC2 instances. Load balancing plays a crucial role in distributing incoming network traffic across multiple servers to ensure optimal resource utilization, high availability, and fault tolerance.
What is Load Balancing?

Load balancing is a method employed to distribute network traffic among numerous servers or resources, preventing any individual server from becoming a bottleneck. This enhances the availability and reliability of applications by guaranteeing that no single server is overloaded with too much traffic.
What is Elastic Load Balancing?
Elastic Load Balancing (ELB) is a service offered by AWS that automatically disperses incoming application traffic among various targets, including EC2 instances, containers, and IP addresses, across one or more Availability Zones. ELB offers a scalable and fault-tolerant solution, ensuring that your application can manage fluctuating levels of traffic without requiring manual intervention.

Types of Load Balancers
Amazon Web Services (AWS) provides 3 primary types of load balancers, each designed for specific usage scenarios:
Application Load Balancer (ALB)
Operates at Layer 7, making routing decisions based on request content.
Suited for microservices or container-based applications, enabling the routing of HTTP/HTTPS traffic based on request content.
Features include host and path-based routing, support for containerized applications, and advanced metrics.

Network Load Balancer (NLB)
Operates at Layer 4, routing traffic based on IP protocol data.
Ideal for managing high request volumes with low latencies, making it suitable for TCP, UDP, and TLS traffic.
Offers the capability to handle varying traffic patterns while maintaining ultra-low latencies.

Classic Load Balancer (CLB)
Operates at both the application and transport layers.
Primarily designed for legacy applications running in the EC2-Classic network.
Provides fundamental load balancing across multiple EC2 instances.

How Does Elastic Load Balancing Work?
Clients initiate requests to your application.
The load balancer's listeners handle requests that align with the configured protocol and port.
The designated listener assesses incoming requests according to the specified rules. If applicable, the request is then directed to the relevant target group. Utilizing an HTTPS listener allows the load balancer to manage the tasks of TLS encryption and decryption.
Traffic is directed to healthy targets within one or more target groups, determined by the load-balancing algorithm and the routing rules outlined in the listener configuration.
Advantages of AWS Load Balancers
High Availability: Load balancers effectively distribute traffic among multiple targets, guaranteeing high availability and fault tolerance.
Scalability: Easily achieve horizontal scaling of your application by effortlessly adding or removing instances behind the load balancer.
Security: ELB enhances security by offering SSL/TLS termination, relieving your application servers from the SSL/TLS decryption process.
Monitoring and Logging: AWS provides detailed metrics and logging, allowing you to monitor performance and address any potential issues through detailed insights.
Task 01
Launch 2 EC2 instances with an Ubuntu AMI and use User Data to install the Apache Web Server.
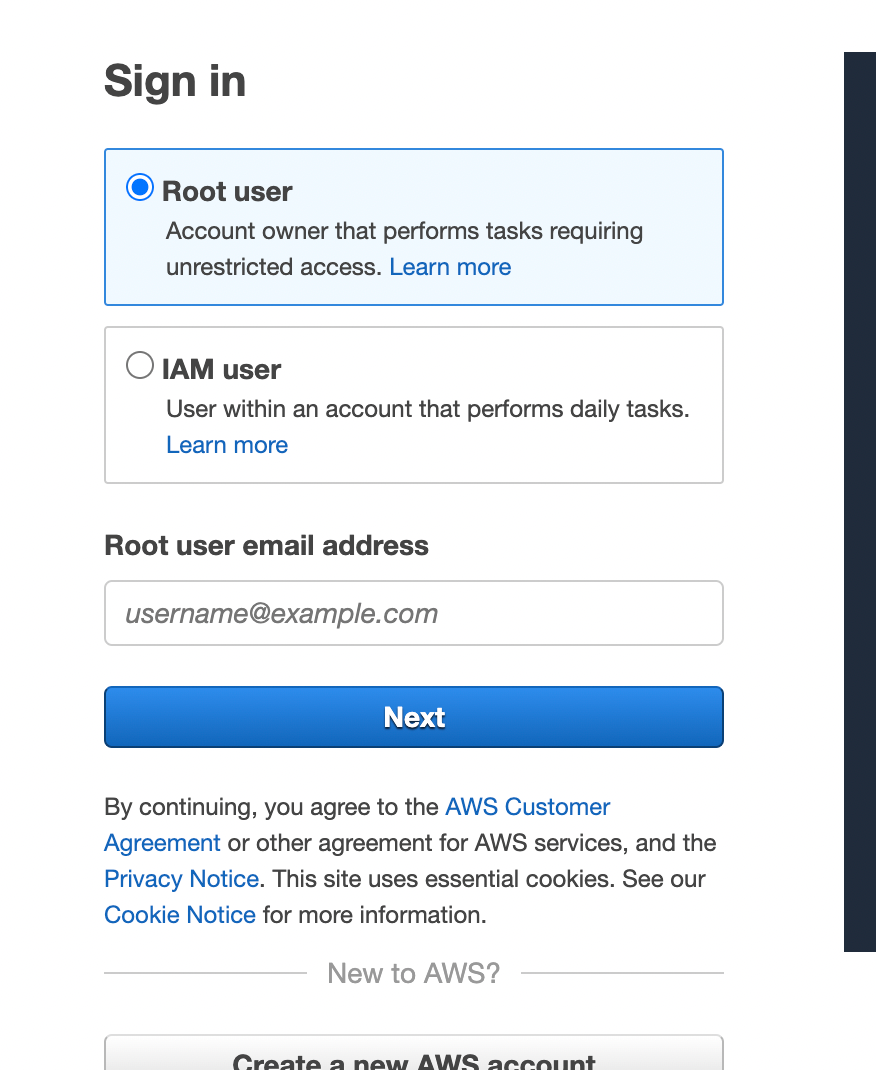
Go to the AWS login page and select Root user.

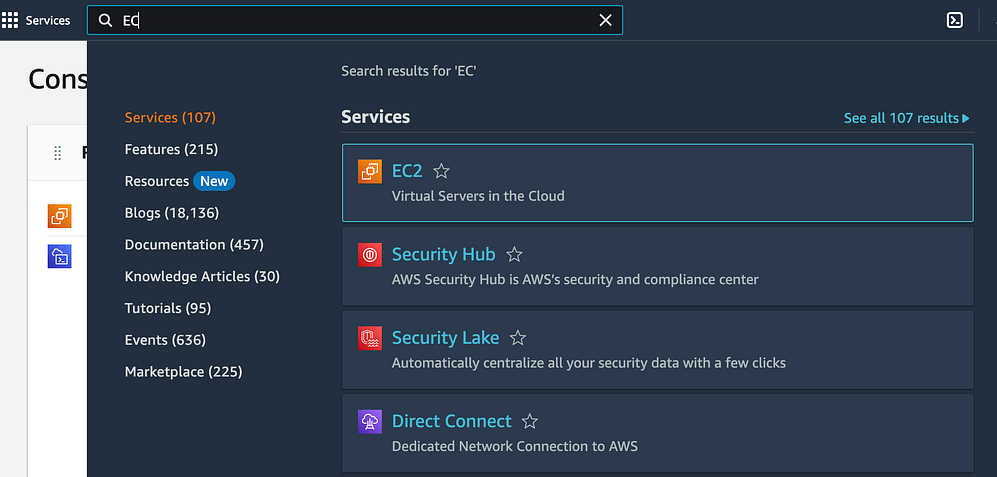
Enter "EC2" in the search box and proceed to click on "Launch instance."

Select a Linux AMI as "Ubuntu Server".

Select the instance type, customize the instance details, incorporate storage, and configure security groups as needed.


On the "Configure Instance Details" page, navigate to the lower section labeled "Advanced Details," and then expand the "User data" field.
Within the "User data" field, input the following commands to install and initiate the Apache web server.
 !#/bin/bash
 sudo apt update
 sudo apt install apache2 -y
 sudo systemctl start apache2
 sudo systemctl enable apache2
Two instances have been successfully generated.

Click on the "Connect" button for any of the servers, copy the SSH command, paste it into the Terminal, and observe the installation of the Apache Web Server.
Copy the public IP address of your EC2 instances, then open a web browser and paste the public IP address into the address bar. A webpage displaying information about your PHP installation should be visible.

For the other server, "apache-server2," check the status of Apache2. Navigate to the "/var/www/html" path and modify the "index.html" file.
Copy the public IP address of that particular EC2 instance, then open a web browser and paste the public IP address into the address bar. A webpage displaying information about your PHP installation should be visible.
Task 02
Create an Application Load Balancer (ALB) in EC2 using the AWS Management Console.
Access the AWS Management Console and navigate to the EC2 dashboard.
Select "Load Balancers" from the left-hand navigation menu and subsequently click the "Create Load Balancer" button.

Choose "Application Load Balancer" as the type of load balancer, and proceed by clicking "Create."

Set up the load balancer configurations, including the name, listener, security group, and availability zones. Opt for either HTTP or HTTPS as the listener based on your application's specific needs.


Configure the "Security Groups" settings.

Create a target group by specifying a name, protocol, port, and health check settings. Choose the availability zones with the load balancer and designate the instances launched in Task 01 as targets for the target group.

Add the EC2 instances launched in Task 01 into the Application Load Balancer (ALB) as target groups.


The load balancer has been successfully created.

The target group has also been successfully created.

Confirm the proper functioning of the Application Load Balancer (ALB) by checking the health status of the target instances and conducting tests to evaluate the load balancing capabilities.
Confirm that the instances are registered with the load balancer by inspecting the health status of the target group. All instances in the group should display a healthy status.

Test the load balancing capabilities by accessing the load balancer's DNS name in a web browser. Confirm that traffic is evenly distributed across the instances.
Conclusion
In conclusion, setting up an Application Load Balancer with AWS EC2 is a crucial step in building scalable, highly available, and fault-tolerant applications in the cloud. With ELB, you can ensure that your application can handle varying levels of traffic while maintaining optimal performance.
If you found this blog helpful, do let me know and learn more about AWS and DevOps practices, feel free to connect with me on LinkedIn.
Let's build a network of like-minded professionals exploring the vast world of cloud computing together!


